It was the first week of the WHO declaring Covid-19 a pandemic. The governor of California had announced the state’s very first two-week lockdown and asked everyone in the state to ‘hunker down at home’. All shops (except essentials) were shut for in-store purchases and I was particularly weary of ordering anything online. Those were the days of possible surface exposure to SARS-COV2.
Now imagine the panic that gripped me, during such a time, as I stared at my only bottle of red ink that I had just accidentally toppled, spilling more than half of its red contents on to the floor. While still in shock, I began wiping the floorboards to remove the red stain, wondering how I was going to get thorough the lockdown without this particular red ink. Think about it—the pandemic was declared such mid-March 2020, but it had started affecting Southeast Asia sometime in December 2019, as we knew it then. So, was I supposed to go without this red ink till . . . June 2020?!

I used to paint every weekend, sitting in the kitchen or the backyard, enjoying the Los Angeles sunshine. It was my way of unwinding from the week’s work and worries, to have a little vacation away into my little watercolour landscapes. So, during the then newly-announced lockdown, the idea of working from home and not meeting anyone to avert a possible fatal viral infection wasn’t going to be an issue for me—as long as I could paint!
It was the morning of 21st March 2020 and I was creating a plan for an entire series of artworks that I was going to paint in those two weeks of staying in. That was when my hand hit the red ink bottle, which then hit the floor and seeing which a good dose of adrenaline rushed to my brain (or whatever other nerve-juice does during a crisis) resulting in my decision to begin making my own colours at home. I figured that if early humans could do it, then so could I in 2020, in the Information Age, and with help from friends who are textile designers (because they know their natural dyes). With all that, I went off on a stewing and dyeing spree, using flowers, onion skins, avocado skins, spinach leaves, and many other kitchen scraps—not to find just a red, but to find every possible colour I could put to paper!
It’s now been over two years since I spilled that ink and stumbled into the world of natural dyes and pigments. This is a world that has existed across continents, cultures and a significant length of time! Which means I have a long way to go in discovering what I can do with all the existing knowledge and take things forward.
Upon my return home to India and continuing to stay at home for the rest of 2020, I made a list of natural sources that I could easily find in my country, and more so within my locality. This list came to include peels and skins of onions, pomegranate and Indian avocados from kitchen scraps. It also included karivepaku (curry) leaves and neem leaves from my parents’ backyard; dried manjistha (madder) roots and indigo powder from a small business, and flowers sourced from a local flower seller, my backyard as well as the neighborhood trees.
Making Hibiscus Dye and Ink
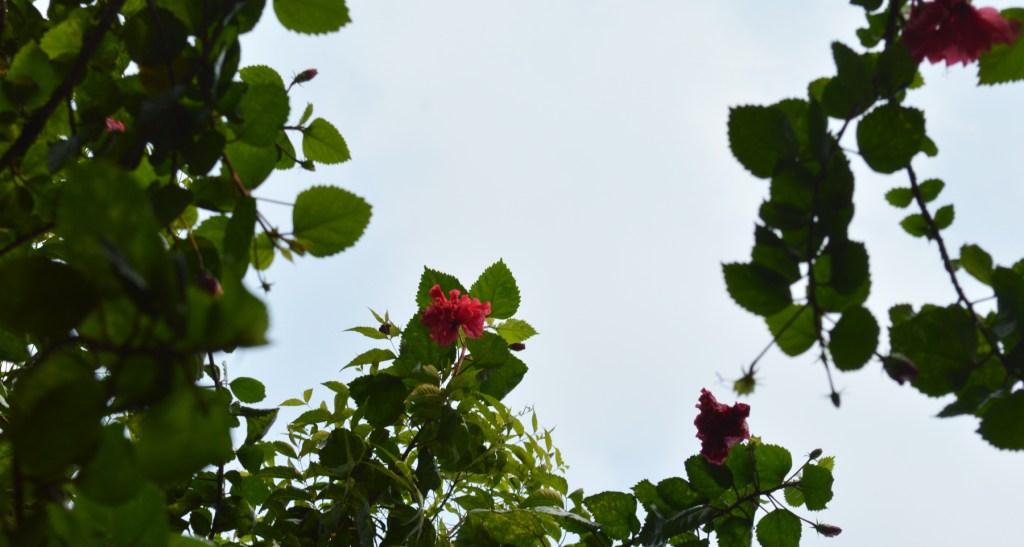
From the list, the most spectacular results that I’ve had (and continue to) are in extracting colour from Hibiscus flowers (Hibiscus rosa-sinensis) that grows in our backyard, planted by my mother. I’m writing this blog to share with you the steps and processes that I’ve used to extract the dye and lake pigment from this natural source. Why? Because I find it rather magical, and hope you will find some charm in it too.
It starts with picking the flowers.
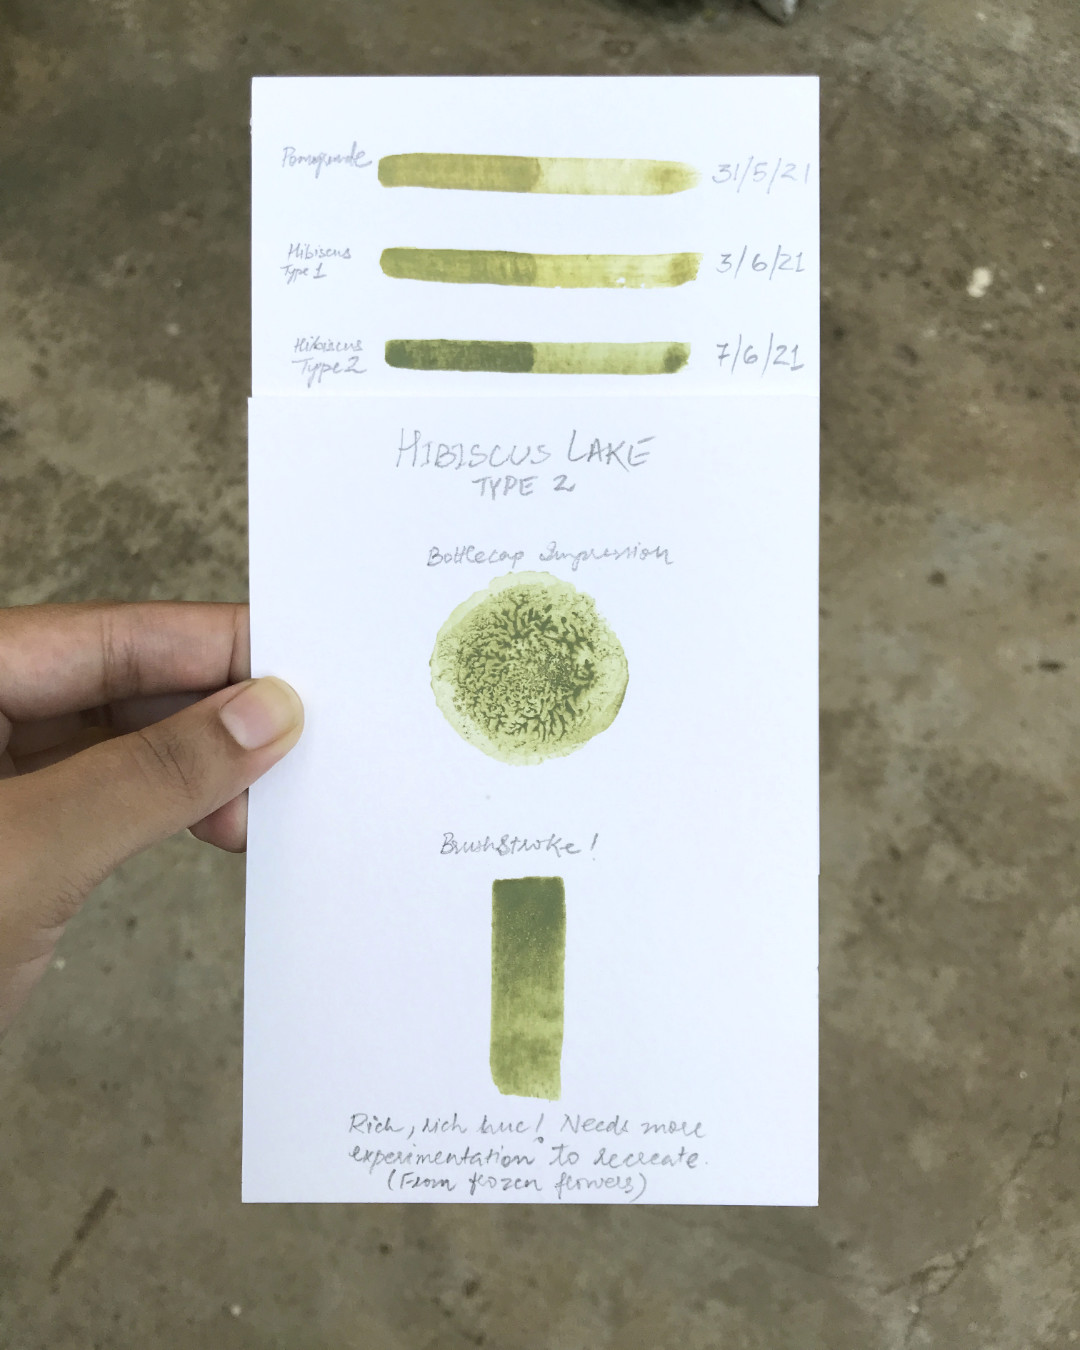
I’ve experimented with freshly plucked flowers as well as with just-fallen ones picked up from the ground. Depending upon the amount of dye I need, I collect the flowers and freeze them till I have enough. While the difference between using fresh and frozen flowers is minimal, I did find that the resulting hue is least satisfying when I collect fallen flowers that sat decaying for more than a day.
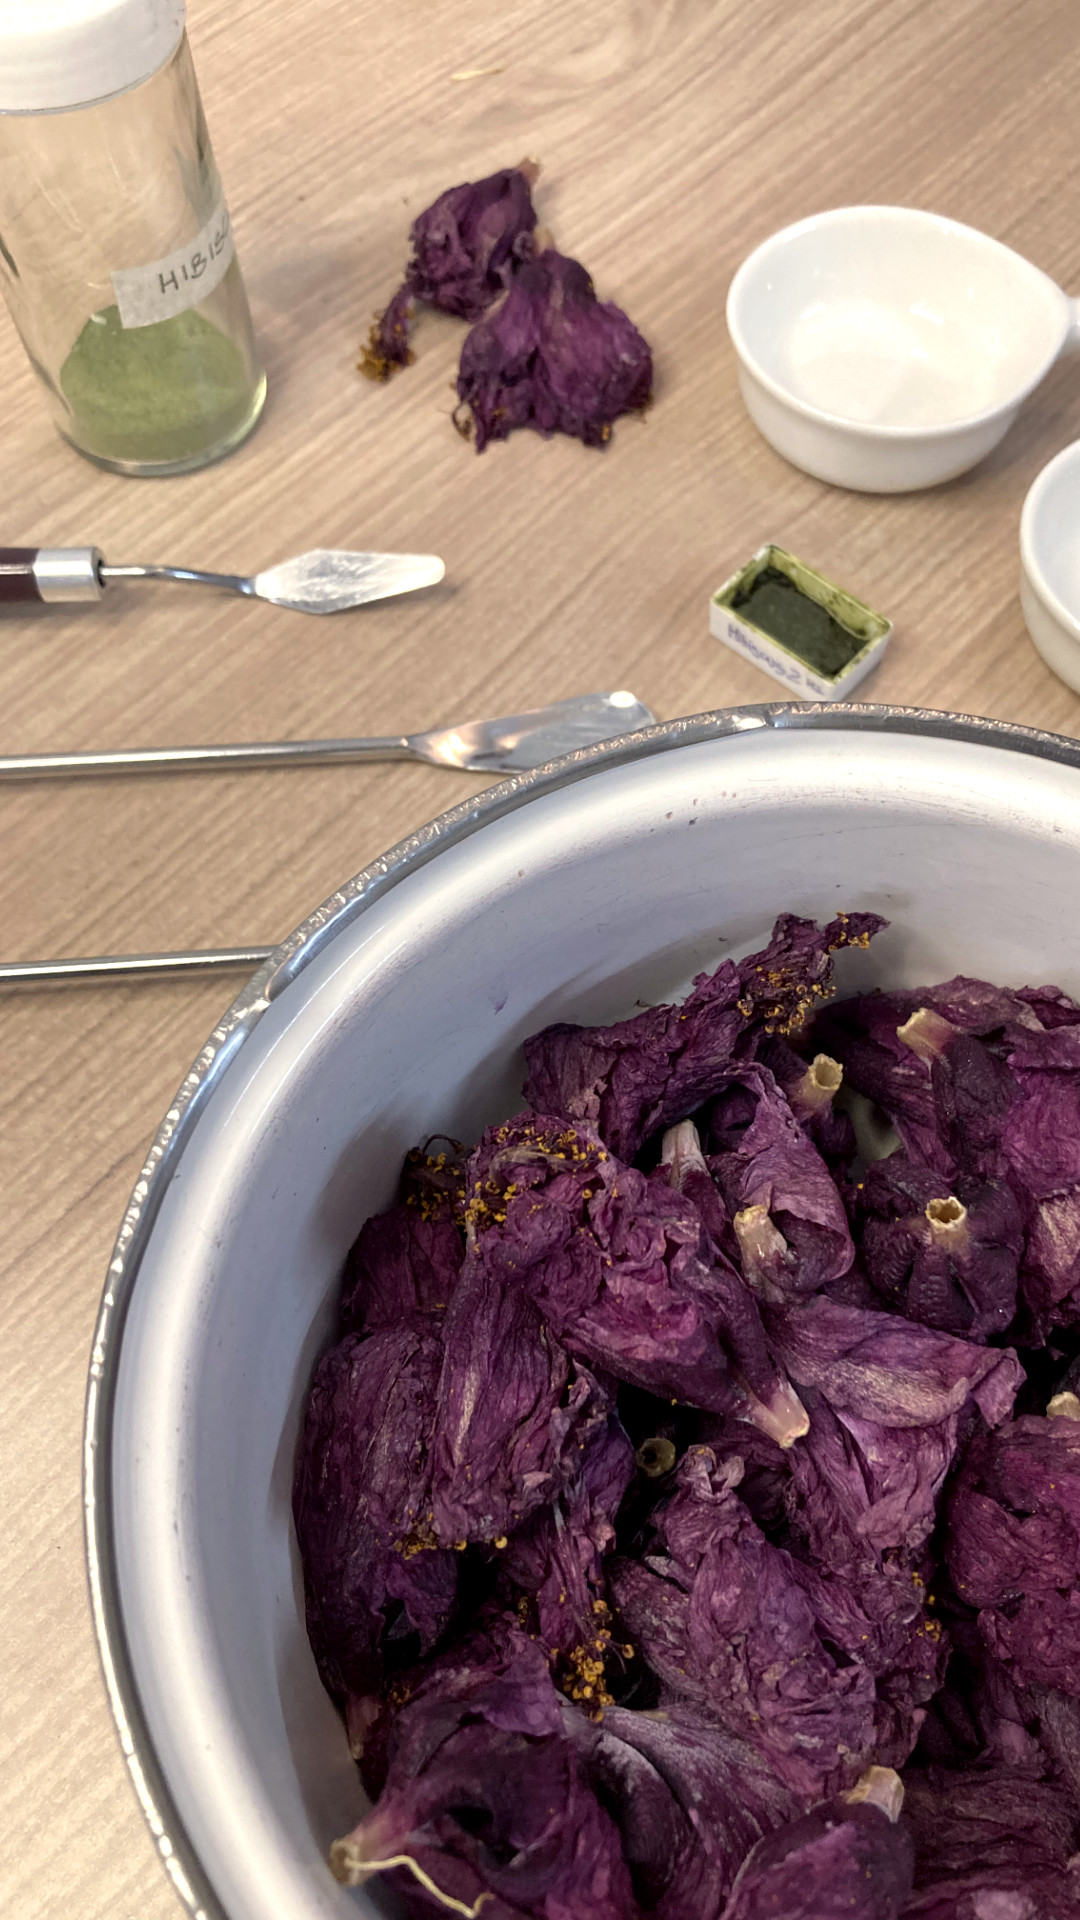
Next is the heating.
I begin with gently heating the water with the flowers in them and wait till the colour of the water changes—when the pigment starts to release into it. While distilled water is ideal to start with a neutral pH level, I use purified drinking water as it currently most accessible to me on a daily basis. Depending upon the quantity and ratio of flowers to water used, the dye preparation may take anything from 10 to 20 mins. I take particular care to not over-heat the dye when working with flowers, as it sometimes turns the pigment brown! Which means keeping an eye on the colour of the simmering liquid is essential in this process, as is turning off the flame to use residual heat towards the end. When I’m satisfied with the colour of the dye, I keep some aside in a little bottle (mixed with some clove oil) to use like an ink. Some of my paintings with this ink can be found here in my collections of 2020 and 2021.


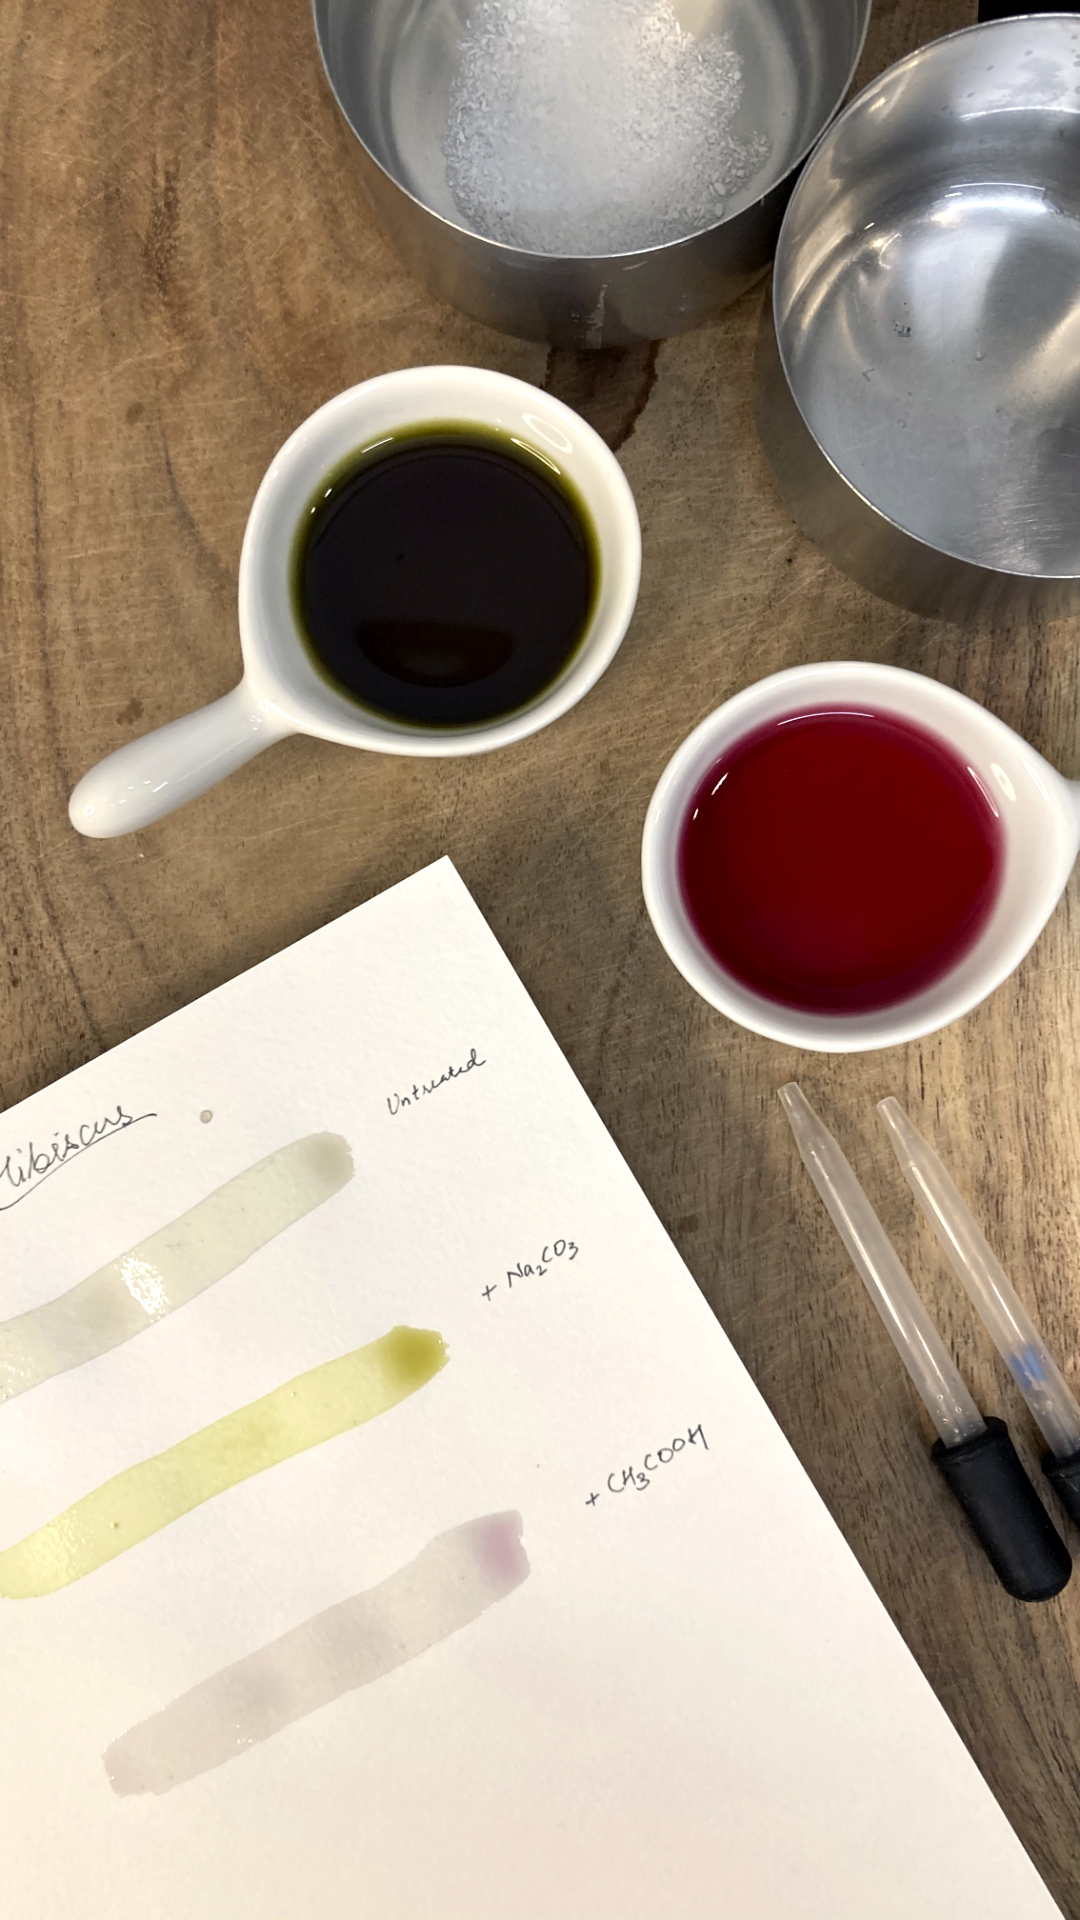
Experimenting with additives.
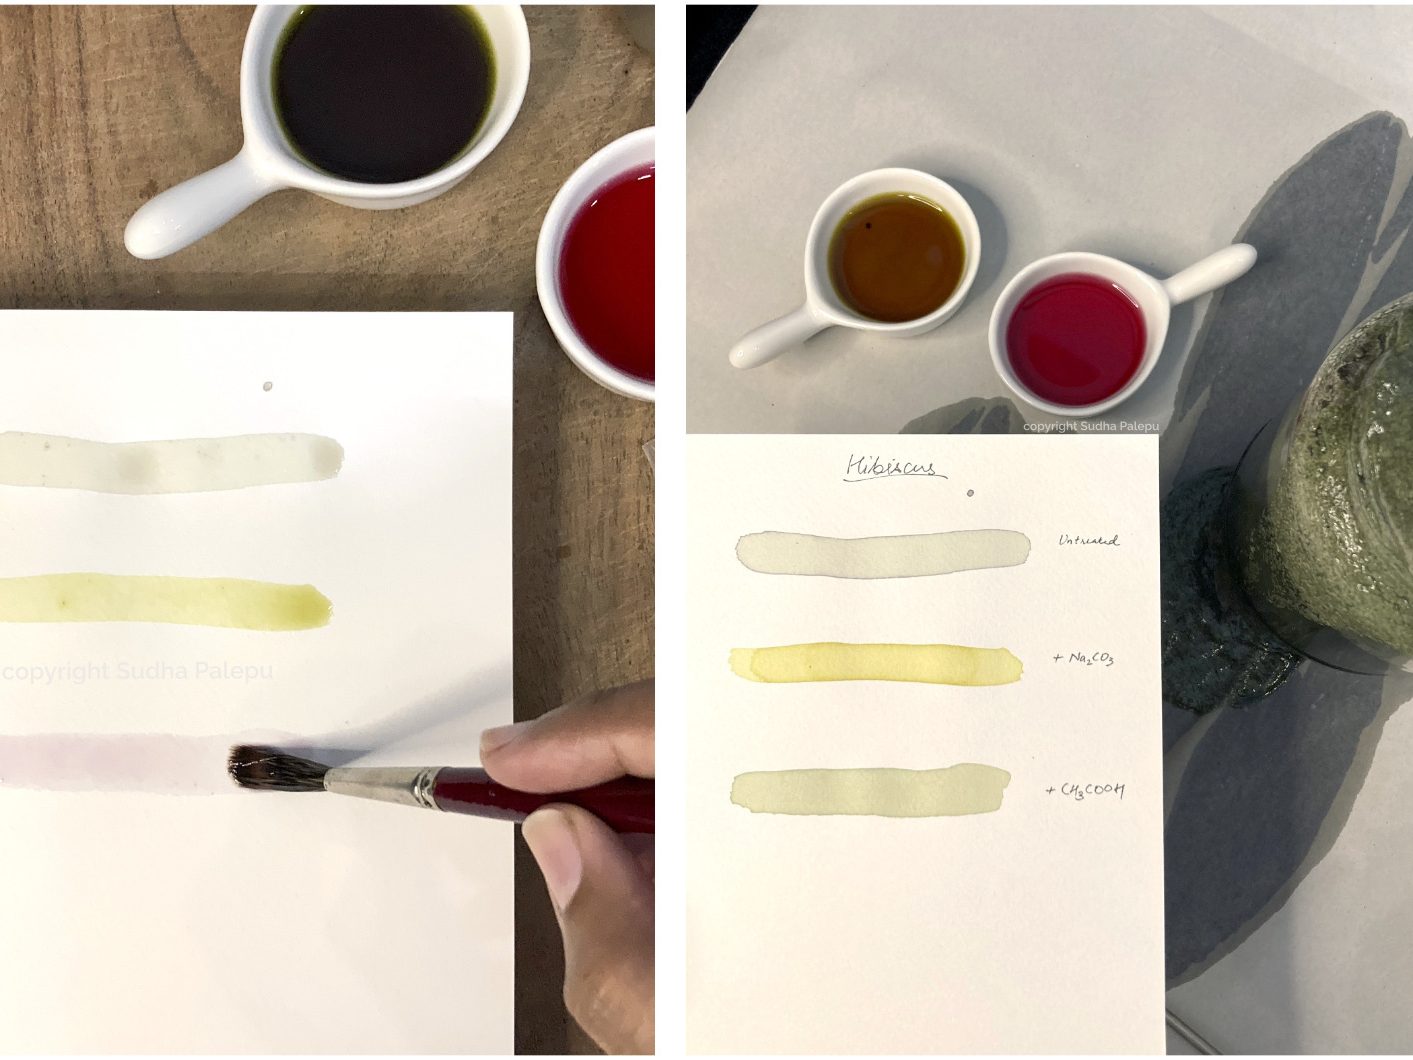
Before proceeding with extracting the lake pigment, I use simple pH altering additives to check the change in colour of the dye. These additives are usually an acid (vinegar) and an alkali (washing soda) that are easily accessible in a kitchen. This is a quick and fun exploration with the hibiscus dye, seeing how it changes the hues in a surprising manner. Adding vinegar turns the deep reddish-pink hue of the dye a little fluorescent pink, and adding washing soda instantly changes it to green. That’s right, this pink flower starts at a deep reddish hue, but turns green with additives and time!
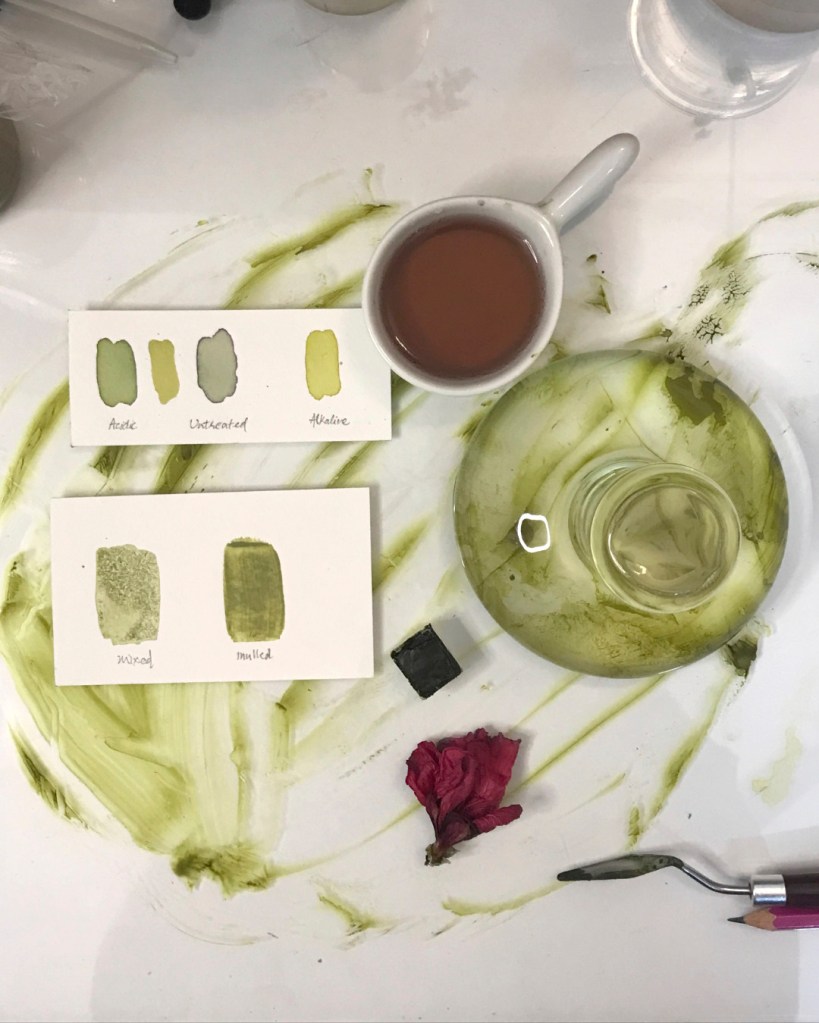
You can see the initial difference in colours in my brush stroke swatches with the untreated, alkaline and acidic versions of the dye on paper. More colour transformation become visible after these swatches dry, as all three become a version of green or greenish yellow upon exposure to light. This intermediate stage (of experimenting with additives) gives me a sense of what the final colour of the lake pigment might be, based on the visible change in colour.
When I began working with natural dyes in 2020, I read about how these do not last on paper for long. Being highly light fugitive, natural colours either fade away with time or turn from being bright and hue-rich to dull and bleached versions of themselves. This is not the result of extraordinary circumstances, but just the most basic exposure to everyday light and environmental heat, moisture etc.
Now, a textile designer or an art historian would have known details of this phenomenon from the start, given their early training, research and understanding of pigments. I took the first-hand-experimenting-in-the-kitchen-on-weekends route of making dyes, painting with them on paper and watching them turn dull and brown over just a few days/weeks, followed by internet research to truly understand what was going on.
Initially, this felt like an amusing way of keeping myself distracted from the mind-bending, once-in-a-century unfortunate event that was going on. Yet, over multiple weekends in continued lockdown and a never-ending urge to paint, this whole endeavor took on more meaning than I had imagined. I needed these natural colours to stay with me, on paper, for a little longer than they did. Yes, I felt a tiny bit abandoned every time I saw a swatch or a whole painting turn dull and brown, but I also knew that it was possible to keep the colours bright a little longer with a bit of hands-on chemistry explorations! Hence, lake pigments.
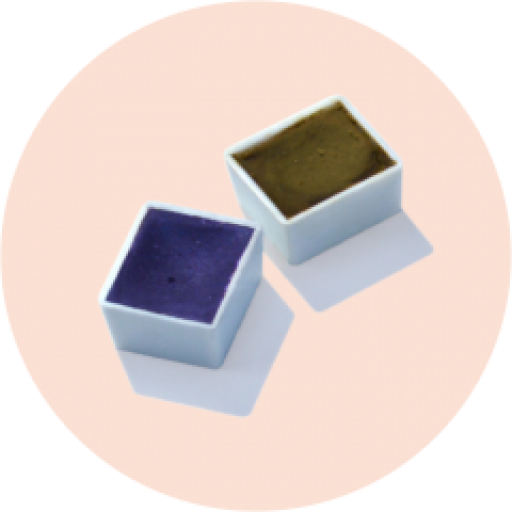
Making Hibiscus Lake Pigment
While the hibiscus dye is also light fugitive and exhibits ephemeral qualities, the lake pigment I managed to extract from it has stayed green for longer in my watercolour paintings. This hibiscus pigment has now become a staple for me in painting all kinds of foliage. Mixed with some indigo pigment, it produces a variety of blue-green shades.
So, what is a lake pigment?
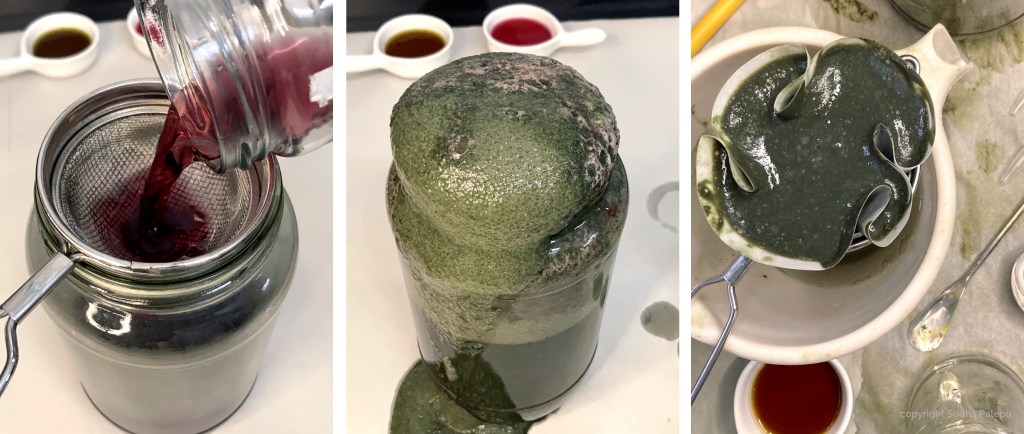
It is the result of a relatively simple chemical reaction, where the colour-carrying part of the natural dye is extracted by precipitating it using an inert binder or a mordant. The exact process varies with the natural of organic compound in the natural dye at hand and the reagents used to precipitate the pigment. I work mainly with potassium aluminium sulfate (or alum) solution to act as the mordant that attaches to the pigment in the dye solution, followed by adding the alkaline solution of sodium carbonate to precipitate the pigment-mordant compound formed.
What makes this process really fun is that the experiment is a very visual experience, where the chemical reactions produce colour changes and effervescence when the solutions are mixed in the right concentrations. The physical changes that occur during the formation of the lake pigment upon precipitation is the most exciting. This final precipitate can be separated from the liquid using a filter paper, and left to dry over a day or two. While the chemical reaction takes little time, it is the waiting for the pigment to precipitate, and then waiting for it to dry that take the longest time. Depending upon the weather, the drying part can take a couple of days.


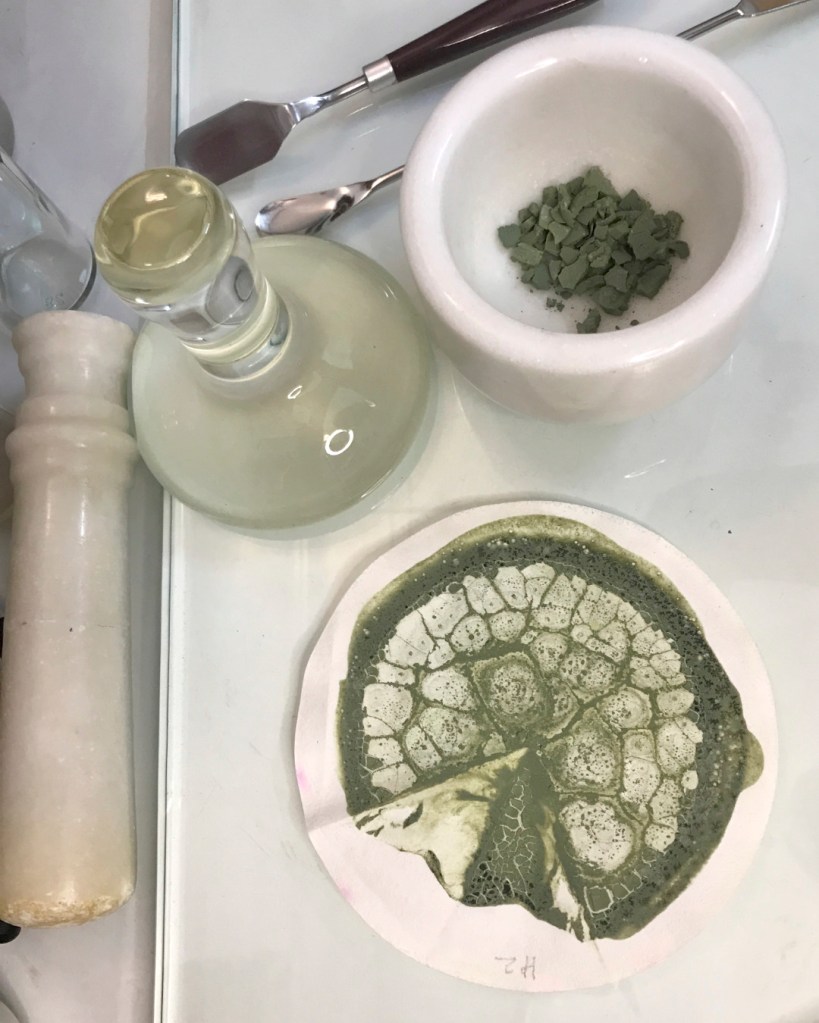
Lake pigment dries in filter paper.
After the pigment completely dries, I remove it from the filter paper, crush it in a mortar-pestle and mix it with a solution of gum Arabic, water and glycerin, to create the final watercolour paint! To state the obvious, there are some safety precautions that I take while making my own paints. These include wearing gloves, face masks and even an apron.
Depending upon the concentration of the dye, and proportions of the alum and alkali solution used, the colour of the resulting pigment may vary. I’ve made this hibiscus pigment a couple of times now, and almost every time I get a warm green hue. I’ve kept a record of all the other lake pigments I’ve extracted from different natural sources, and it’s quite the exercise to keep track of what causes any change in resulting colour of the pigment.
If you are interested in making your own lake pigments, I’ve shared here two sources of excellent instructions that are available online. First is the website by Rebecca Desnos, a natural dyer from the UK. She writes about her experiments with natural dyeing, curates stories by other artists/dyers and publishes them on her website and books. This guest blog post on her website is an excellent place to start reading about making lake pigment. Second, is from the website of the Royal Society of Chemistry (also the UK), where this particular page has detailed instructions on making lake pigments with proper chemistry lab equipments.
More natural pigments explorations and artworks are in the making! Keep in touch by joining my mailing list for updates.
Join my mailing list!
All Works © Sudha Palepu, 2026

Leave a comment